Pages

Wednesday, November 20, 2024

How to Build a Wine Rack from Reclaimed Wood

How to Build a Wine Rack from Reclaimed Wood

Building a Wine Rack from Reclaimed Wood: A Guide to Rustic Elegance

Reclaimed wood, with its unique character and history, offers an exceptional material for crafting a wine rack that adds a touch of rustic charm to any space. Its natural beauty and sustainability make it a popular choice for discerning homeowners. This comprehensive guide will walk you through the process of building a stunning wine rack from reclaimed wood, ensuring a functional and aesthetically pleasing piece that showcases the raw elegance of this versatile material.

Choosing the Right Reclaimed Wood

The first step in building a wine rack from reclaimed wood is selecting the right material. Consider the following factors:

Wood Type:

Reclaimed wood can come from a variety of sources, including old barns, houses, and even pallets. Choose wood species that are known for their durability, such as oak, pine, or cedar. The grain pattern and color of the wood will also influence the overall aesthetic of the rack.

Condition:

The condition of the reclaimed wood will affect its usability. Inspect the wood for signs of rot, infestation, or significant warping. While some imperfections can add character, excessive damage may make the wood unsuitable for construction.

Thickness and Width:

The thickness and width of the reclaimed wood boards will determine the structural integrity and design possibilities of the wine rack. Thicker boards provide greater stability, while wider boards can accommodate larger bottles.

Planning the Design

Once you have chosen the reclaimed wood, it's time to plan the design of your wine rack. Consider the following factors:

Size and Capacity:

Determine the desired size of the rack based on the space available and your wine collection. Consider the number of bottles you need to store and the width of the shelves to accommodate different bottle sizes.

Shape and Style:

The shape and style of the wine rack can be customized to complement your décor. Popular options include freestanding racks, wall-mounted racks, and even wine racks with integrated bottle holders. Choose a design that aligns with your personal preferences and the overall aesthetic of your space.

Features:

Consider additional features that enhance functionality and aesthetics, such as built-in bottle stoppers, glass holders, or decorative elements like metal accents or vintage hardware.

Preparing the Reclaimed Wood

Before starting construction, properly prepare the reclaimed wood to ensure a smooth and durable finished product:

Cleaning and Drying:

Thoroughly clean the reclaimed wood to remove dirt, debris, and any remaining coatings. Allow the wood to dry completely, either naturally or with a dehumidifier, to prevent warping during construction.

Cutting and Shaping:

Cut the reclaimed wood boards to the desired dimensions using a circular saw, miter saw, or table saw. Use a jigsaw or hand-held saw for intricate cuts and shaping. Ensure all cuts are precise to ensure proper alignment and stability.

Sanding:

Sand the reclaimed wood boards thoroughly to remove any rough edges or imperfections. Start with a coarser grit sandpaper and gradually progress to finer grits to achieve a smooth finish. This step will also help create a uniform surface for staining or painting.

Construction Steps

Follow these step-by-step instructions to build your reclaimed wood wine rack:

Assembling the Base:

Create a sturdy base for the wine rack using two or three long pieces of reclaimed wood joined together with wood glue and screws. Ensure the base is level and secure to prevent wobbling.

Building the Shelves:

Construct each shelf using two or more pieces of reclaimed wood, depending on the desired width. Join the pieces together using wood glue and screws. Ensure the shelves are cut to the exact length and width to fit properly on the base.

Attaching the Shelves to the Base:

Attach the shelves to the base using wood glue and screws. Position the shelves evenly and secure them firmly to prevent sagging. Add decorative elements or braces for added support if desired.

Finishing Touches:

Once the wine rack is assembled, apply a protective finish to enhance the beauty and longevity of the reclaimed wood. Consider options such as:

  • Staining: A stain will bring out the natural grain and color of the reclaimed wood, adding depth and richness.
  • Painting: Painting the wine rack allows for customization and personalization with a wide range of colors and finishes.
  • Waxing or Oil Finishing: Wax or oil finishes will enhance the natural beauty of the reclaimed wood while providing protection from water and scratches.
  • Safety Precautions

    When working with reclaimed wood and power tools, it's essential to prioritize safety:

  • Wear safety glasses and hearing protection to protect your eyes and ears.
  • Use proper lifting techniques to avoid strain and injury.
  • Keep work areas clean and clutter-free to minimize tripping hazards.
  • Use a dust mask when sanding to prevent inhaling wood dust.
  • Conclusion

    Building a wine rack from reclaimed wood is a rewarding project that allows you to create a unique and functional piece that showcases the beauty of this sustainable material. By following these guidelines, you can craft a rustic and elegant wine rack that adds charm and character to your home while responsibly repurposing old wood.

    Read More..

    Shoe Racks with a Rustic Look That Sell Well Online

    Shoe Racks with a Rustic Look That Sell Well Online

    Rustic Shoe Racks: A Winning Formula for Online Sales

    In the realm of online retail, the demand for rustic-themed furniture is booming, and shoe racks are no exception. Their natural charm and timeless appeal resonate with a wide range of shoppers. But how can you create a shoe rack that not only looks great but also sells like hotcakes online? Let's explore the key ingredients for success.

    Understanding the Rustic Aesthetic

    Rustic style embraces the beauty of natural elements and imperfections. Think reclaimed wood, distressed finishes, and a touch of vintage charm. This look evokes a sense of warmth, comfort, and connection to nature. When it comes to shoe racks, rustic elements can take various forms:

    Materials That Matter

    • Reclaimed Wood: Adds character and sustainability to your design.
    • Rustic Metal: Provides a sturdy framework and complements the wood beautifully.
    • Natural Stone: Incorporating accents like slate or river rock can add a touch of elegance and texture.

    Design Elements for Success

    • Distressed Finishes: Create a worn and weathered look that adds authenticity.
    • Open Shelving: Allows for easy access and showcasing of footwear.
    • Rustic Hardware: Use iron accents, leather straps, or rope details for a touch of vintage charm.

    Crafting Winning Online Listings

    Once you've designed a captivating rustic shoe rack, it's time to showcase it effectively online. High-quality photography and compelling descriptions are crucial for driving sales. Here's what to focus on:

    Photography That Captures the Essence

    • Natural Lighting: Use natural daylight to capture the true colors and textures of the wood and metal.
    • Lifestyle Images: Show your shoe rack in a real home setting, highlighting its functionality and style.
    • Close-ups: Highlight the details like distressed finishes, rustic hardware, and the overall construction.

    Descriptive Content That Sells

    • Highlight the Unique Features: Emphasize the reclaimed wood, distressed finishes, or handcrafted details.
    • Describe the Material and Construction: Provide details on the wood type, metal used, and the durability of the piece.
    • Focus on Functionality: Mention the shoe capacity, the stability of the rack, and its ease of assembly.

    Boosting Sales with Smart Strategies

    To truly maximize your online sales, incorporate these strategies into your approach:

    Target the Right Audience

    Utilize online advertising platforms and social media marketing to reach individuals interested in rustic decor and home improvement projects.

    Offer Excellent Customer Service

    Respond promptly to inquiries, provide clear shipping information, and handle any issues with professionalism. Positive customer experiences lead to repeat business and positive reviews.

    Run Promotions and Discounts

    Offer limited-time discounts, bundles, or free shipping to entice customers and drive impulse purchases.

    By focusing on these elements, you can create a rustic shoe rack that stands out in the crowded online marketplace and attracts a loyal customer base. Remember, quality craftsmanship, compelling visuals, and a customer-centric approach are the key to success in online retail.

    Read More..

    Tuesday, November 19, 2024

    DIY Wood Toolbox Organizers for Home and Garden

    DIY Wood Toolbox Organizers for Home and Garden

    DIY Wood Toolbox Organizers for Home and Garden

    A well-organized toolbox is a joy to behold. It’s easy to find what you need, and everything has its place. But if your toolbox is a jumbled mess, it can be frustrating to use. You're constantly digging around for the right tool, and you might even end up damaging your tools in the process. Fortunately, with a little DIY ingenuity, you can easily create custom wood organizers to tame the chaos and bring order to your toolbox.

    Benefits of DIY Wood Toolbox Organizers

    There are several benefits to building your own organizers. They’re more affordable than store-bought alternatives and you can design them to fit your specific needs. You can use scrap wood or reclaimed wood, adding a unique charm and making them environmentally friendly. You’ll also get the satisfaction of crafting something useful with your own two hands.

    Materials and Tools

    Before you begin your project, gather the necessary materials and tools:

    • Wood (plywood, pine, or cedar work well)
    • Wood glue
    • Wood screws
    • Screwdriver or drill
    • Saw (circular saw, jigsaw, or hand saw)
    • Measuring tape
    • Pencil
    • Sandpaper (medium and fine grits)
    • Optional: Stain, paint, or sealant

    Project Ideas: Easy DIY Wood Toolbox Organizers

    1. Divider System

    Create a system of dividers that keep tools separated and organized. Measure the width and depth of your toolbox. Cut pieces of wood to fit as dividers, leaving room for each tool category. Use wood glue and screws to attach the dividers to the bottom or sides of your toolbox.

    2. Hanging Tool Rack

    Construct a hanging tool rack to maximize space and keep tools readily accessible. Cut wood to create a rectangular frame. Add hooks, pegboard holes, or slots to hold various tools. Attach the rack to the top or side of your toolbox using screws or hinges.

    3. Drawer Insert

    Enhance a drawer with a custom insert to keep smaller tools and accessories organized. Measure the dimensions of the drawer. Cut pieces of wood to fit and create compartments for different tools. Secure the insert to the drawer bottom with glue and screws.

    4. Magnetic Tool Strip

    A magnetic tool strip is perfect for hanging metal tools. Attach a strip of magnetic tape to a piece of wood. Cut the wood to the desired length, ensuring it fits within the dimensions of your toolbox. Screw the wooden strip with the magnetic tape to the side of your toolbox.

    Tips for Building DIY Wood Toolbox Organizers

    • Plan your layout carefully before cutting any wood.
    • Use quality wood glue and screws for durability.
    • Sand all edges to prevent splinters.
    • Use wood stain, paint, or sealant to protect and enhance the look of your organizers.

    Conclusion

    Building DIY wood toolbox organizers is a rewarding project that can transform your toolbox from a chaotic mess to a well-organized space. With a little creativity and effort, you can craft custom organizers that meet your specific needs and bring a sense of order to your tools.

    Read More..

    Monday, November 18, 2024

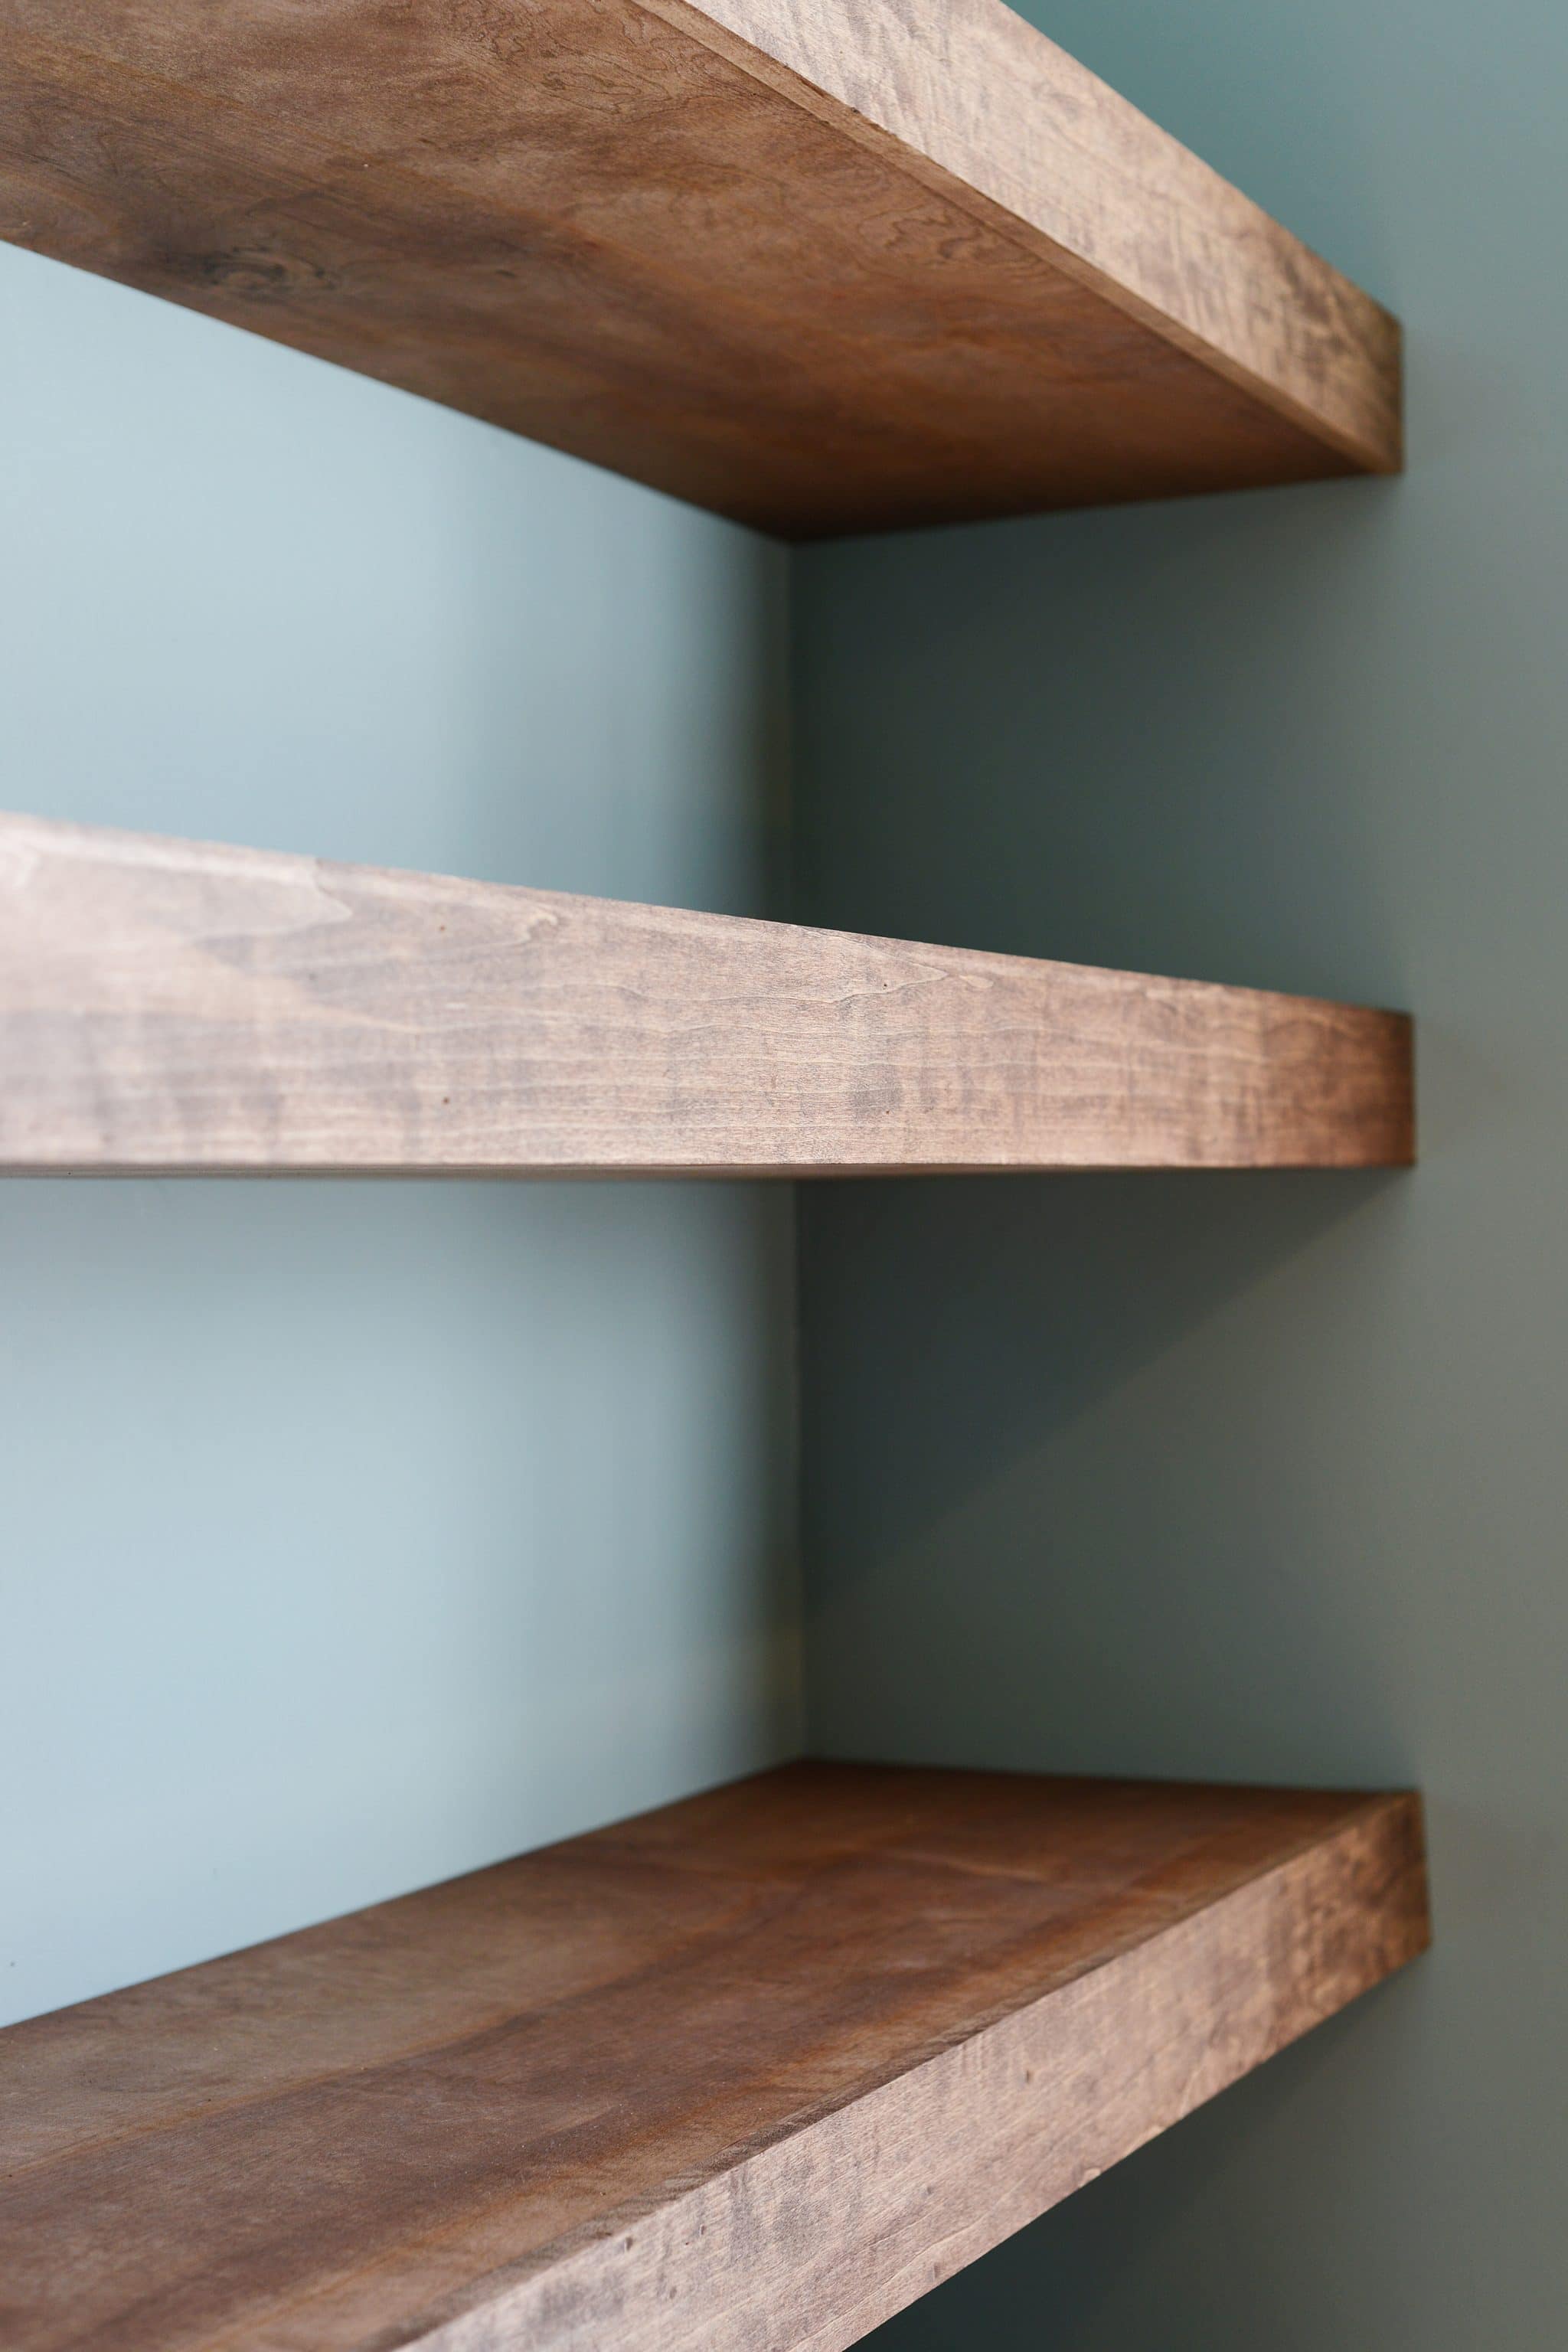
    Wooden Floating Shelves for Your Bathroom: DIY Project Ideas

    Wooden Floating Shelves for Your Bathroom: DIY Project Ideas

    Wooden Floating Shelves for Your Bathroom: DIY Project Ideas

    Tired of cluttered bathroom countertops and limited storage space? Floating shelves offer a stylish and practical solution, adding both functionality and visual appeal to your bathroom. And the best part? You can easily build your own with a few simple materials and tools. This DIY project is surprisingly achievable, even for beginners. Let's dive in and explore some inspiring ideas.

    Choosing the Right Wood

    The first step in your floating shelf journey is selecting the perfect wood. Consider these factors:

    • Water resistance: Bathrooms are humid environments, so choose a wood that can withstand moisture. Teak, cedar, and redwood are excellent choices for their natural water-repellent properties. You can also opt for treated wood, which is designed to resist rot and decay.
    • Appearance: Wood comes in various colors, grain patterns, and finishes. Choose a style that complements your bathroom decor. A rustic look might suit a farmhouse bathroom, while a sleek, modern finish would complement a contemporary space.
    • Budget: Wood prices vary depending on species, thickness, and availability. Set a realistic budget and explore options that fit your needs and wallet.

    Essential Tools and Materials

    To build your floating shelves, gather these tools and materials:

    • Wood: Select your preferred wood species and cut it to your desired dimensions for the shelf and supports.
    • Wood screws: Use screws that are long enough to securely fasten the shelf to the wall.
    • Drill: A cordless drill with a Phillips head bit is essential for driving screws and creating pilot holes.
    • Level: Ensure your shelves are installed straight and level with a reliable level tool.
    • Measuring tape: Accurately measure your shelf locations and ensure proper spacing.
    • Pencil: Mark the wall for screw placement and to outline shelf dimensions.
    • Sandpaper: Smooth any rough edges on the wood and create a polished finish.
    • Wood stain or paint: Optional - enhance the wood's natural beauty with a stain or add a touch of color with paint.
    • Safety glasses and gloves: Protect your eyes and hands while working with wood and tools.

    Simple Floating Shelf Design Ideas

    The possibilities are endless when it comes to designing your floating shelves. Here are a few simple ideas to get you started:

    Single-Shelf Design

    This classic design is perfect for adding storage and visual interest to a small area. You can create a single shelf by cutting a piece of wood to your desired length and width. Attach two supports to the back of the shelf, which will be screwed into the wall. Keep the supports flush with the back of the shelf for a clean, seamless look.

    Tiered Shelves

    For a more expansive storage solution, build a tiered shelf unit. This involves creating multiple shelves stacked one above the other. Use supports to connect the shelves, creating a stable and visually appealing design. Consider staggering the shelves for added dimension and visual interest.

    Corner Shelves

    Make the most of unused corner space with custom-designed corner shelves. Cut two pieces of wood to form a right angle and attach them to create a triangular shelf. Attach the shelf to the wall at the corner, ensuring it's securely fastened.

    Tips for Successful Shelf Installation

    To ensure your shelves are installed flawlessly, follow these tips:

    • Pre-drill pilot holes: This prevents the wood from splitting when driving screws.
    • Use a level: Double-check that the shelf is level before attaching it to the wall.
    • Consider weight capacity: Choose screws and supports that can handle the weight of the items you plan to store on the shelf.
    • Anchor to studs: For extra stability, attach the shelf supports directly to wall studs.
    • Finish your shelves: Sand and apply a stain or paint to protect the wood and enhance its appearance.

    Building your own wooden floating shelves is a rewarding DIY project that adds both functionality and style to your bathroom. With a little creativity and these tips, you can create a stunning storage solution that elevates your bathroom decor and brings a touch of personal style to your space. So, grab your tools, choose your wood, and get ready to embark on your bathroom transformation!

    Read More..

    Wednesday, November 13, 2024

    Perfect DIY Wine Rack Gifts for Wine Lovers

    Perfect DIY Wine Rack Gifts for Wine Lovers

    Perfect DIY Wine Rack Gifts for Wine Lovers

    For the wine enthusiast in your life, a thoughtfully crafted DIY wine rack can be a truly special gift. Not only does it showcase your creativity and care, but it also offers a practical solution for storing and displaying their precious bottles. From rustic farmhouse chic to modern minimalist styles, there's a DIY wine rack project to suit every taste and skill level.

    Wood Wine Racks: A Timeless Classic

    Wood is a classic material for wine racks, offering a warm and natural aesthetic that complements any décor. Here are some inspiring DIY wood wine rack ideas:

    Reclaimed Pallet Wine Rack

    Give old pallets a new lease on life by transforming them into a rustic wine rack. Simply remove the planks and use them to create a horizontal or vertical rack. You can leave the wood natural or stain it for a more polished look.

    DIY Wine Rack from Scrap Wood

    With some basic woodworking skills and scrap wood, you can build a unique wine rack from scratch. Start by sketching your design, then cut and assemble the wood pieces using wood glue and screws. You can create a simple rectangular rack or explore more intricate designs with angled shelves and bottle dividers.

    Rustic Branch Wine Rack

    Embrace the beauty of nature by creating a rustic wine rack from branches. Find sturdy branches of varying sizes, clean them thoroughly, and then attach them to a sturdy base. For a more polished look, you can sand the branches and apply a sealant.

    Metal Wine Racks: A Modern Touch

    Metal wine racks bring a touch of modern sophistication to your wine collection. Here are a few DIY metal wine rack ideas that are sure to impress:

    Industrial Pipe Wine Rack

    For a bold industrial look, utilize plumbing pipes and fittings to create a wine rack. Connect the pipes together using elbows and tees, and attach them to a sturdy base. You can also use a variety of pipes and fittings to create unique and personalized designs.

    Wire Mesh Wine Rack

    Wire mesh offers a simple yet stylish solution for storing and displaying your wine bottles. Cut a piece of wire mesh to your desired size and shape, then attach it to a wooden or metal frame. The open structure allows for easy access and ventilation.

    DIY Wine Rack from Metal Sheet

    Metal sheet can be easily cut and shaped to create custom wine racks. First, draw your design onto the sheet, then use a metal shears or laser cutter to cut out the pieces. Use metal rivets or bolts to join the pieces together, creating a unique and personalized rack.

    Creative Wine Rack Ideas: Beyond the Ordinary

    For a truly unique gift, explore these creative and unusual DIY wine rack ideas:

    Upcycled Wine Bottle Wine Rack

    Give new purpose to old wine bottles by transforming them into a functional wine rack. Cut the bottom off of several bottles, and then attach them to a sturdy base. The bottles will serve as individual bottle holders for a unique and eco-friendly display.

    Wine Rack Wall Art

    Combine functionality with art by creating a wine rack that doubles as a decorative piece. Use a variety of materials, such as wood, metal, or even repurposed items, to construct a visually appealing wine rack that will be a focal point of any room.

    Hanging Wine Rack

    Save valuable floor space by creating a hanging wine rack. You can use ropes, chains, or even wooden dowels to suspend the rack from the ceiling or a wall. This is a great option for small spaces or those who want to add a unique touch to their wine storage.

    Tips for Creating a DIY Wine Rack Gift

    Creating a DIY wine rack requires careful planning and execution. Here are some essential tips to keep in mind:

    Consider the Recipient's Style and Space

    Before starting your project, think about the recipient's personal style and the available space in their home. Choose a design and materials that complement their decor and provide adequate storage for their wine collection.

    Safety First: Securely Attaching Bottles

    Ensure the wine rack is built with safety in mind. Use sturdy materials and secure attachments to ensure the bottles are safely held and will not fall or break. Consider adding additional support or reinforcements if necessary.

    Finishing Touches for a Polished Look

    Once the wine rack is assembled, don't forget the finishing touches. Sand, paint, or stain the wood to achieve the desired look. You can also personalize the rack with engravings, paint accents, or decorative hardware.

    Presentation Matters: Packaging and Presentation

    Present your DIY wine rack in a visually appealing way. Wrap it in a decorative paper or fabric and add a personalized gift tag. You can even include a bottle of wine or other wine-related accessories to complete the gift.

    Conclusion

    Crafting a DIY wine rack is a thoughtful and rewarding experience. With a little creativity and effort, you can create a unique and personalized gift that will be cherished by any wine enthusiast. From rustic wood designs to modern metal creations, the possibilities are endless.

    So, unleash your inner craftsman and create a memorable DIY wine rack gift that will be treasured for years to come.

    Read More..

    Tuesday, November 12, 2024

    How to Make a Coffee Table: Free DIY Plans PDF

    How to Make a Coffee Table: Free DIY Plans PDF

    How to Make a Coffee Table: Free DIY Plans PDF

    Looking to add a touch of personal style and functionality to your living room? Building a coffee table from scratch is a rewarding DIY project that allows you to express your creativity and save money. This comprehensive guide provides free downloadable PDF plans and step-by-step instructions to guide you through the process, from material selection to finishing touches.

    Choosing Your Coffee Table Style

    Before diving into the construction, it's essential to envision your ideal coffee table. Consider these factors:

    Size and Shape

    The size and shape of your coffee table should complement your living room's layout and existing furniture. Measure the available space to determine the optimal dimensions. Popular coffee table shapes include:

    • Rectangular: Classic and versatile, offering ample surface area.
    • Square: Compact and suitable for smaller spaces.
    • Round: Adds a touch of elegance and creates a sense of flow.
    • Oval: Combines the best of both worlds, offering a spacious surface without sharp corners.

    Material

    The material you choose will influence the look and feel of your coffee table. Popular options include:

    • Wood: Offers durability, warmth, and a wide range of finishes.
    • Metal: Provides a modern and industrial aesthetic.
    • Glass: Creates a sleek and minimalist look.
    • Concrete: Adds a rustic and contemporary touch.

    Features

    Think about the features you desire in your coffee table. Do you want storage space? Drawers, shelves, or hidden compartments can add practicality. Consider adding casters for easy mobility or a built-in tray for serving.

    Downloadable PDF Plans

    To ensure a successful build, download the free coffee table plans in PDF format. These plans will provide detailed instructions, diagrams, and material lists, allowing you to plan your project efficiently.

    Plan Selection

    Choose a plan that aligns with your preferred style, size, and material. The plans available include:

    • Modern Coffee Table: Features a sleek design and open shelves.
    • Rustic Coffee Table: Utilizes reclaimed wood and adds a touch of farmhouse charm.
    • Mid-Century Coffee Table: Combines simple lines and classic design elements.
    • Industrial Coffee Table: Incorporates metal accents and exposed hardware.

    Required Materials

    The specific materials will vary based on your chosen plan. However, common materials include:

    • Wood: Depending on the plan, you may need various types of wood, such as pine, oak, or plywood.
    • Fasteners: Screws, nails, and wood glue are essential for joining the pieces.
    • Finishing Materials: Stain, paint, or varnish to achieve your desired look.
    • Hardware: Hinges, drawer slides, and casters may be needed depending on the plan.

    Tools and Equipment

    To build your coffee table, you will need a few essential tools:

    • Saw: A circular saw or table saw for precise cuts.
    • Drill: To create pilot holes and fasten screws.
    • Screwdriver: For securing screws and hardware.
    • Measuring Tape: For accurate dimensions.
    • Level: To ensure your table is level and stable.
    • Sandpaper: To smooth the surfaces and prepare for finishing.

    Construction Process

    Once you have your materials, tools, and plans ready, follow these steps:

    1. Cut the Wood

    Begin by carefully cutting the wood pieces to the dimensions specified in the plan. Use a saw to make accurate cuts, ensuring straight lines and precise angles.

    2. Sand the Surfaces

    After cutting, sand all the wood surfaces to create a smooth finish and remove any splinters. Use different grits of sandpaper to achieve a desired level of smoothness.

    3. Assemble the Frame

    Join the wood pieces to create the table's frame. Follow the instructions in the plan, using screws, nails, or wood glue for secure connections. Ensure the frame is square and level using a measuring tape and level.

    4. Add Additional Features

    Depending on your chosen plan, add additional features such as drawers, shelves, or storage compartments. Follow the instructions provided in the plan for attaching and securing these components.

    5. Attach the Top

    Secure the table top to the frame. Ensure the top is properly aligned and level before attaching it permanently. Consider using wood glue or heavy-duty fasteners for durability.

    6. Finish the Table

    Once the table is assembled, apply your chosen finishing materials. Stain, paint, or varnish the wood to achieve your desired color and protection. Follow the manufacturer's instructions for application and drying times.

    7. Add Hardware

    If your plan includes hardware such as hinges, drawer slides, or casters, install them according to the instructions. Ensure they are securely attached and function smoothly.

    Finishing Touches

    To complete your coffee table, consider these finishing touches:

    1. Apply a Protective Coat

    After the finishing materials have dried, apply a protective coat of polyurethane or wax to enhance the durability and longevity of your coffee table. This will protect the wood from scratches, stains, and water damage.

    2. Add Decorations

    Personalize your coffee table with decorative elements. Consider adding a vase of flowers, a stack of books, or a decorative tray. These touches will add a touch of personality and create a welcoming atmosphere.

    3. Enjoy Your Creation

    Congratulations! You have successfully built your own coffee table. Sit back, relax, and enjoy the satisfaction of crafting a unique and functional piece of furniture.

    Tips for Success

    • Plan Ahead: Carefully review the plans before starting the project, ensuring you have all the necessary materials and tools.
    • Measure Twice, Cut Once: Accuracy is key for a well-constructed coffee table. Measure twice before making any cuts to ensure the pieces fit perfectly.
    • Use Quality Materials: Invest in durable wood and other materials to ensure your table lasts for years to come.
    • Take Your Time: Building a coffee table takes time and patience. Avoid rushing the process to ensure a quality finish.
    • Don't Be Afraid to Ask for Help: If you encounter any difficulties or have questions, don't hesitate to reach out to a friend, family member, or experienced woodworker for guidance.

    Building a coffee table from scratch is an achievable and rewarding DIY project. With these free plans and step-by-step instructions, you can create a beautiful and functional piece of furniture that will be the centerpiece of your living room. Embrace the challenge, unleash your creativity, and enjoy the satisfaction of crafting something truly unique.

    Read More..

    Easy Pallet Firewood Rack Building Tips for Beginners

    Easy Pallet Firewood Rack Building Tips for Beginners

    Building a Pallet Firewood Rack: Easy Tips for Beginners

    Hey there, fellow fire enthusiasts! You know the struggle â€" those messy stacks of firewood taking up valuable space in your garage or backyard. It's time to get organized and build a sturdy, stylish firewood rack using recycled pallets. And don't worry, this project is a breeze, even if you're a DIY newbie. I'm here to walk you through it step-by-step, with tips and tricks to make your firewood rack the envy of the neighborhood.

    Finding the Perfect Pallet

    First things first, you need the star of the show: the pallet! Not all pallets are created equal, so let's find the right one for your project. Look for a pallet that's sturdy and free of any major damage. You want it to be able to handle the weight of your firewood without bowing or breaking.

    What Type of Pallet Should You Use?

    Here's the breakdown of the most common pallet types:

    • Standard Pallets: These are the most common type, with a flat top and two horizontal supports. They're great for basic firewood racks.
    • Stringer Pallets: These have vertical stringers that create a more open structure, perfect for creating unique designs.
    • Block Pallets: These are sturdy and robust, often used for heavier loads and could be ideal for firewood racks that will hold a lot of wood.

    Where to Get Your Pallet

    Now, where to find this treasure? Here are some great spots:

    • Local Businesses: Many businesses are happy to give away pallets. Just ask nicely! Hardware stores, grocery stores, and lumber yards are good places to start.
    • Craigslist and Facebook Marketplace: Check these online marketplaces for free or inexpensive pallets. You might find some real gems!
    • Pallet Recycling Centers: Some companies specialize in pallet recycling. They might have a selection of pallets available for a small fee.

    Safety First!

    Before you get started, it's important to take a moment to think about safety. Pallets can be heavy and have rough edges, so be careful when handling them. Wear gloves and safety glasses for protection. Here are some key safety tips:

    • Inspect the Pallet: Make sure the pallet is sturdy and free of any loose nails or splinters before you use it.
    • Use a Sawhorse: Place the pallet on a sawhorse or sturdy workbench to make it easier to work with and prevent injuries from bending over.
    • Proper Tool Handling: Be cautious when using tools like saws, drills, and hammers. Always use them according to the manufacturer's instructions.

    Building Your Pallet Firewood Rack

    Alright, let's get our hands dirty! Here's a basic guide to building a simple yet functional firewood rack:

    Gather Your Materials

    • 1 Pallet: Choose a pallet that's sturdy and the right size for your needs.
    • Saw: A circular saw or handsaw will be needed to cut the pallet to size.
    • Screws: Use screws that are long enough to go through the pallet and into the supports.
    • Drill: Use a drill to pre-drill holes before screwing, especially if you're working with hardwood.
    • Measuring Tape: Essential for making accurate cuts and marking your work.
    • Level: Ensures your rack is stable and looks great.
    • Safety Glasses and Gloves: For protection while you're working.

    Assembly Steps

    Now, follow these steps to assemble your firewood rack:

    1. Clean the Pallet: Give your pallet a good scrub to remove any dirt, debris, or loose nails. You might even consider sanding the surface for a smoother look.
    2. Measure and Cut: Decide how long you want your firewood rack to be and measure the pallet accordingly. Mark the cutting lines with a pencil or marker, then use your saw to cut the pallet to size.
    3. Assemble the Base: If desired, you can create a base for your rack. You can use additional pallet pieces or even build a simple wooden frame. This will raise your rack off the ground and prevent rot.
    4. Attach the Support Pieces: You can use extra pallet pieces or cut down some 2x4s to create supports for your firewood. Screw these supports to the bottom of the pallet, creating a stable platform for your wood.
    5. Secure the Top: If desired, you can add a top piece to the rack. This will keep the firewood from rolling out and add a finished look. Secure it to the supports with screws.
    6. Sand and Stain (Optional): For a more polished look, you can sand down the rough edges and apply a wood stain or paint.

    Get Creative!

    Now that you've mastered the basics, let's unleash your creativity! Here are some fun ideas to take your pallet firewood rack to the next level:

    • Add a Backrest: Make your rack extra cozy by adding a backrest. You can use a section of pallet or create a simple frame out of wood.
    • Create a Tiered Design: Stack multiple pallets to create a tiered rack, perfect for storing different sizes of firewood.
    • Incorporate Metal Elements: Add some industrial flair by using metal brackets or pipes for support.
    • Paint it Up!: Let your imagination run wild with paint! Create a rustic look with a natural wood stain, go bold with bright colors, or give it a chic farmhouse feel with a whitewash.
    • Add Storage: Think about adding shelves or drawers to your rack for storing fire starters, kindling, or even tools.

    Enjoy Your New Firewood Rack!

    Congratulations! You've now got a stylish and functional firewood rack that's sure to impress. It's time to gather around the fire pit and enjoy those cozy evenings with your new creation. And remember, the possibilities are endless with a little creativity and DIY spirit. Happy building!

    Read More..

    Quick and Simple DIY Compost Bin for Your Garden

    Quick and Simple DIY Compost Bin for Your Garden

    Quick and Simple DIY Compost Bin for Your Garden

    Composting is a fantastic way to reduce waste, enrich your soil, and create a thriving garden. Building a DIY compost bin is easier than you think and can be done with readily available materials. This guide will walk you through the process of constructing a simple yet effective compost bin that will transform your kitchen scraps and yard waste into nutrient-rich compost.

    Choosing Your Materials

    The beauty of a DIY compost bin is that you can use materials you already have or can easily source. Here are a few common options:

    Wood Pallets

    Wood pallets are readily available and make an excellent framework for a compost bin. You can either use the pallet as is, or dismantle it and use the planks to create a more refined structure. Remember to ensure the pallet is free from any chemical treatments or paint.

    Wooden Planks

    If you have leftover wooden planks from other projects, these are perfect for building a simple rectangular bin. You can use screws or nails to assemble the planks and create a sturdy structure.

    Chicken Wire or Hardware Cloth

    For a more airy and open compost bin, you can use chicken wire or hardware cloth to create the walls. These materials allow for good airflow, which is essential for the composting process. You can attach them to a wooden frame or use stakes to create a freestanding bin.

    Building Your Compost Bin

    Once you've chosen your materials, you can start constructing your bin:

    Step 1: Gather Your Materials

    Start by gathering all the materials you need, including wood planks, screws, chicken wire, or hardware cloth, and any tools like a screwdriver, hammer, or tape measure.

    Step 2: Measure and Cut

    Measure the desired size of your compost bin and cut your materials to size. If you are using wooden planks, make sure to cut them to create four equal sides.

    Step 3: Assemble the Frame

    Connect the wooden planks or pallet sections to create the frame of your bin. Securely fasten the pieces together using screws or nails, ensuring the corners are square.

    Step 4: Attach the Sides

    If you are using chicken wire or hardware cloth, attach it to the frame using staples, wire, or zip ties. Make sure there are no gaps to prevent smaller compost materials from escaping.

    Step 5: Add a Base

    For a more stable compost bin, add a base to the structure. You can use leftover plywood, a piece of metal sheeting, or even a sturdy piece of plastic.

    Step 6: Add Ventilation

    Compost needs air to breathe, so add ventilation holes to your bin. Drill holes in the sides or use a mesh material to create openings for airflow.

    Composting 101

    Now that your compost bin is ready, you can start composting! Follow these tips for success:

    What to Compost

    Compost your kitchen scraps, such as vegetable and fruit peels, coffee grounds, eggshells, and tea bags. Add yard waste like leaves, grass clippings, and small branches.

    Layering is Key

    Layer green materials like food scraps and grass clippings with brown materials like leaves and shredded paper. This creates a good balance for successful composting.

    Keep it Moist

    Your compost bin should be damp but not soggy. Water it regularly, especially during dry periods.

    Turn the Compost

    Turning your compost regularly will help it decompose faster and evenly. Use a shovel or garden fork to mix the materials.

    Time to Harvest!

    You can harvest your compost after a few months when it has broken down into a rich, dark, crumbly material. It's ready to use in your garden to nourish your plants.

    Composting is a rewarding process, and with your newly constructed DIY compost bin, you'll be well on your way to creating healthy soil and a sustainable garden. Enjoy the journey of transforming waste into valuable compost!

    Read More..

    Cold Frame Plans with Clear Instructions

    Cold Frame Plans with Clear Instructions

    Cold Frame Plans with Clear Instructions

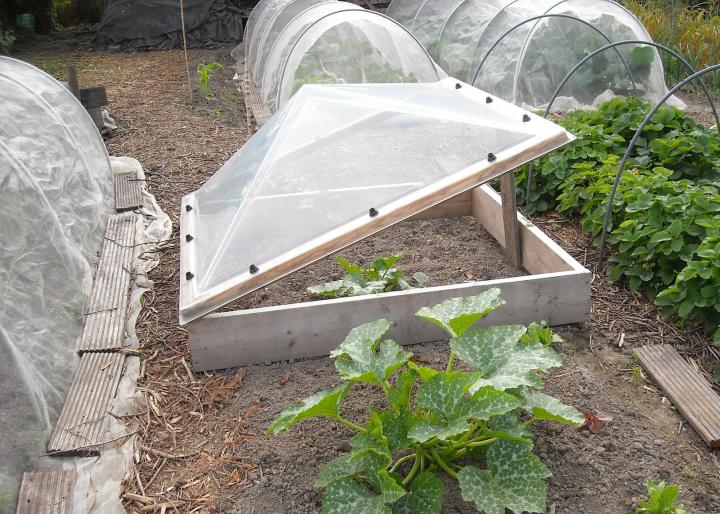
    A cold frame is a simple and affordable structure that can extend your gardening season, protect delicate seedlings from frost, and provide a head start for your vegetable and flower crops. This guide provides comprehensive plans and instructions for building your own cold frame, empowering you to create a valuable addition to your garden.

    Materials

    Before embarking on construction, gather the necessary materials. The following list provides a general guideline, but you can adjust the quantities based on the size and design of your desired cold frame:

    • Wood for frame: Pressure-treated lumber (2x4s or 2x6s) is recommended for durability and resistance to moisture. Alternatively, you can use cedar or redwood for natural rot resistance.
    • Glazing material: Choose from polycarbonate panels, glass, or acrylic sheets. Polycarbonate offers excellent insulation and durability, while glass provides good light transmission but can be heavier and more prone to breakage. Acrylic is a compromise between the two.
    • Fasteners: Wood screws, galvanized nails, or construction adhesive for securing the frame and glazing material.
    • Hardware cloth: For ventilation and pest control, consider using hardware cloth to create a mesh barrier.
    • Soil: Potting mix or a blend of soil, compost, and peat moss for planting.
    • Optional materials: Hinges, latch, weather stripping, paint or stain for finishing.

    Tools

    To ensure a successful cold frame construction, gather the following tools:

    • Saw: A circular saw, miter saw, or hand saw for cutting lumber.
    • Drill: A cordless drill with a variety of drill bits for pilot holes and screwing.
    • Level: A level to ensure the frame is square and stable.
    • Measuring tape: For accurate measurements during the construction process.
    • Hammer: For driving nails or securing other fasteners.
    • Screwdriver: For driving screws or loosening and tightening fasteners.
    • Safety glasses and gloves: To protect your eyes and hands during construction.

    Cold Frame Design

    Choose a cold frame design that suits your needs and available space. Consider the following factors:

    • Size: Determine the dimensions of the cold frame based on your planting needs. A small frame, 2-3 feet wide and 4-5 feet long, is suitable for starting seedlings. Larger frames can accommodate more plants.
    • Shape: Rectangular cold frames are common and easy to build. You can also explore options like lean-to or gable designs, depending on your aesthetic preferences and the available space.
    • Orientation: Position the cold frame facing south to maximize sunlight exposure. Consider the surrounding vegetation to minimize shade.
    • Ventilation: Incorporate a ventilation system to regulate temperature and humidity inside the cold frame. This could include a hinged lid, adjustable vents, or removable panels.

    Construction Instructions

    Once you have gathered the necessary materials and tools, follow these detailed instructions to construct your cold frame:

    1. Build the Frame

    1. Cut the lumber: Using a saw, cut the wood pieces according to the dimensions of your chosen cold frame design. Ensure all cuts are accurate and square.
    2. Assemble the base: Join the four side pieces of the frame to form a rectangle or square. Use screws or nails to secure the corners. Ensure the corners are square using a level.
    3. Attach the top frame: Cut and attach the top pieces of the frame to the base. You can create a single top panel or multiple panels for ventilation. Remember to use screws or nails for secure attachment.

    2. Install the Glazing

    1. Prepare the glazing material: If using polycarbonate panels, cut them to the appropriate size. For glass or acrylic, make sure the pieces fit snugly within the frame.
    2. Secure the glazing: Depending on your chosen material, you can use screws, nails, or construction adhesive to attach the glazing to the frame. Use weather stripping to seal any gaps and prevent drafts.

    3. Incorporate Ventilation

    1. Hinged lid: For a simple ventilation system, create a hinged lid on the top of the frame. This allows for easy access and control over airflow.
    2. Adjustable vents: Incorporate adjustable vents on the sides or back of the frame. These can be constructed from wooden slats, hardware cloth, or other materials.

    4. Prepare the Soil

    1. Fill the cold frame: Add a layer of potting mix or a blend of soil, compost, and peat moss to the bottom of the cold frame.
    2. Level the soil: Ensure the soil surface is level for even plant growth.

    5. Finishing Touches

    1. Paint or stain: For a more finished look, apply paint or stain to the wood frame. Consider using weather-resistant finishes for longevity.
    2. Optional features: Add a latch or other hardware to secure the lid or vents. Install a shelf or raised platform inside the cold frame for easier access to seedlings.

    Tips for Using a Cold Frame

    Once your cold frame is built, follow these tips to maximize its effectiveness:

    • Start seeds indoors: It is best to start seeds indoors and transplant them into the cold frame once they have established themselves. This minimizes the risk of damage from frost or cold temperatures.
    • Monitor temperature: Keep an eye on the temperature inside the cold frame, especially during extreme weather conditions. Use a thermometer to ensure the temperature stays within the optimal range for your plants.
    • Ventilate regularly: Open the lid or vents to provide adequate airflow and prevent excessive humidity. Overheating can lead to plant stress and disease.
    • Water consistently: The soil in a cold frame can dry out quickly, so it's important to water regularly. Use a watering can or drip irrigation system to moisten the soil without disturbing the plants.
    • Protect from pests: Use row covers, hardware cloth, or other pest control methods to prevent pests from entering the cold frame and damaging your plants.

    Conclusion

    Building a cold frame is a rewarding project that extends your gardening season and provides a protective environment for your plants. By following these detailed plans and instructions, you can create a valuable addition to your garden, enhancing your gardening success and enjoying the fruits of your labor.

    Read More..

    How to Build a Cold Frame with Downloadable Plans

    How to Build a Cold Frame with Downloadable Plans

    Build a Cold Frame with Downloadable Plans

    A cold frame is a simple, yet effective way to extend your gardening season, allowing you to start seeds, harden off seedlings, and even overwinter certain plants. Building your own cold frame gives you the freedom to customize it to your needs and ensure it fits perfectly in your garden. This guide will walk you through the process of building a cold frame, including downloadable plans to help you get started.

    Choosing the Right Design and Materials

    Before you start building, consider your garden's needs and available space. Cold frames come in various sizes and shapes, from simple wooden boxes to more elaborate structures with hinged lids and ventilation systems. Decide what features are important to you and whether you prefer a permanent or temporary structure.

    For the frame, you can use various materials such as:

    • Wood: Cedar, redwood, or pressure-treated lumber are good choices for durability and weather resistance.
    • Metal: Aluminum or galvanized steel can provide a long-lasting, rust-resistant structure.
    • Plastic: For a budget-friendly option, consider using PVC pipe or plastic sheeting.

    Choose a glazing material for the cover that lets in sunlight while providing insulation. Popular options include:

    • Glass: Provides excellent light transmission but can be heavy and breakable.
    • Polycarbonate panels: Durable, lightweight, and offer good insulation.
    • Acrylic: Another lightweight and durable option, offering good light transmission.

    Downloadable Cold Frame Plans

    To make building your cold frame easier, you can find free downloadable plans online. Search for "cold frame plans" or "DIY cold frame" on sites like Pinterest, Instructables, and Google Images. These plans will often provide detailed instructions, material lists, and diagrams, making the construction process much smoother.

    Building Your Cold Frame: Step-by-Step Guide

    After choosing your design and materials, gather the necessary tools and equipment, including:

    • Saw
    • Drill
    • Screwdriver
    • Level
    • Measuring tape
    • Safety glasses
    • Work gloves

    Follow these steps to construct your cold frame:

    1. Cut and Assemble the Frame

    Cut the wood or other materials according to your plans. Make sure to use a saw for precise cuts and to create even corners. Then, assemble the frame using screws or nails, ensuring it is square and level.

    2. Add Bracing

    For added stability, reinforce the corners and sides of the frame with bracing. This is crucial, especially if you are using a glass cover, which can be heavy.

    3. Prepare the Base

    If your cold frame is designed to sit on the ground, you'll need to prepare the base area. Remove any weeds or debris and level the ground for a stable foundation. You might choose to add a layer of gravel or pavers for drainage.

    4. Attach the Glazing

    Use a method appropriate for your chosen glazing material. For glass, you can use glazing points or silicone sealant to secure the panes to the frame. For polycarbonate or acrylic panels, you may need special clips or screws designed for these materials.

    5. Install a Ventilation System

    To help regulate temperature and humidity, install a ventilation system. This can be as simple as a hinged lid or a sliding panel on the side of the frame. For a more advanced system, consider adding a thermostat-controlled fan for automated ventilation.

    6. Finalize and Enjoy

    Once your cold frame is complete, add a layer of potting mix to the base. You can then plant your seeds or seedlings and watch them grow, enjoying the extended growing season your new cold frame provides.

    With a little effort and these downloadable plans, you can easily build a cold frame that will enhance your gardening experience and allow you to grow a wider variety of plants throughout the year. Happy gardening!

    Read More..

    Expert Tips for Finishing a DIY Bedside Cabinet

    Expert Tips for Finishing a DIY Bedside Cabinet

    Expert Tips for Finishing a DIY Bedside Cabinet: Achieving a Professional Look

    Building a bedside cabinet is a rewarding DIY project that allows you to create a custom piece that perfectly complements your bedroom decor. However, the true magic lies in the finishing touches. A flawless finish elevates a handmade cabinet from good to exceptional, showcasing your craftsmanship and adding a touch of elegance to your space.

    This guide provides expert tips and techniques to help you achieve a professional-looking finish on your DIY bedside cabinet, ensuring a long-lasting and beautiful result.

    Preparation is Key: Setting the Stage for Success

    A meticulous preparation process is the foundation of a flawless finish. Neglecting this step can lead to uneven application, blemishes, and a subpar final result.

    1. Sanding to Perfection

    Sanding removes any imperfections, smooths the surface, and creates the ideal base for paint or stain. Start with a coarse grit sandpaper (80-120 grit) to remove any rough edges or blemishes. Gradually progress to finer grits (150-220 grit) to achieve a smooth, even surface.

    • Use a sanding block for flat surfaces to maintain consistent pressure.
    • For intricate details, use sandpaper wrapped around a sanding sponge or a small piece of wood.
    • Sand in the direction of the wood grain to avoid scratches.

    2. Dust Removal: Eliminating Contaminants

    Sanding generates dust, which can interfere with the adhesion of paint or stain. After sanding, thoroughly clean the cabinet with a tack cloth or a damp cloth to remove any dust particles.

    • Tack cloths are excellent for picking up fine dust and lint.
    • For stubborn dust, use a damp cloth, but ensure it's completely dry before applying any finishes.

    3. Filling Imperfections: Achieving a Seamless Surface

    Wood filler can be used to address minor imperfections, such as nail holes, cracks, or gaps. Choose a wood filler that matches the color of your wood or the desired finish.

    • Apply a thin layer of wood filler with a putty knife, ensuring it's level with the surface.
    • Allow the wood filler to dry completely as per the manufacturer's instructions.
    • Sand the filled areas smoothly to blend them with the surrounding wood.

    Choosing the Right Finish: Tailoring Your Cabinet's Look

    The finish you choose will determine the aesthetic and durability of your bedside cabinet. Consider the desired look, the wood species, and the environment where the cabinet will be placed.

    1. Paint: A Versatile and Colorful Option

    Paint offers an excellent way to create a vibrant, modern, or rustic look.

    • Latex paint is water-based, dries quickly, and is easy to clean up.
    • Oil-based paint provides a durable, hard-wearing finish but requires mineral spirits for cleanup.
    • Chalk paint offers a matte, vintage-inspired look and can be easily distressed for a unique aesthetic.

    2. Stain: Enhancing the Natural Beauty of Wood

    Stain allows the wood grain to show through while adding color and depth.

    • Oil-based stains penetrate the wood deeply and create a rich, even color.
    • Water-based stains are easier to clean up but may not penetrate as deeply as oil-based stains.
    • Gel stains are thick and provide excellent coverage, ideal for filling in pores and creating a more uniform color.

    3. Varnish: Protecting and Enhancing the Finish

    Varnish provides a clear, protective layer over paint or stain, enhancing the appearance and durability of the finish.

    • Polyurethane is a popular choice for its durability and water resistance.
    • Lacquer offers a glossy, hard-wearing finish but can be more difficult to apply.
    • Shellac provides a warm, natural look and can be used for furniture that will be exposed to food or beverages.

    Application Techniques: Ensuring a Smooth and Even Finish

    The way you apply your finish can significantly impact the final result. Here are some tips for achieving a professional-looking finish.

    1. Thinning the Finish: Achieving Optimal Consistency

    Some finishes, such as paints and stains, benefit from thinning for easier application and better flow. Always consult the manufacturer's instructions for the recommended thinning ratio and the appropriate thinner to use.

    2. Brushes and Rollers: Tools for a Smooth Finish

    The type of brush or roller you use can influence the finish's smoothness and appearance.

    • Use a natural bristle brush for oil-based paints and stains.
    • Synthetic bristle brushes are better suited for water-based paints and stains.
    • For larger surfaces, a foam roller can provide even coverage.

    3. Application Techniques: Avoiding Brush Marks and Streaks

    Proper application techniques can help prevent brush marks, streaks, and other imperfections.

    • Use long, even strokes in the direction of the wood grain.
    • Don't overload your brush or roller.
    • Overlap each stroke slightly to avoid leaving gaps.
    • If using paint, apply thin coats for best results.

    Finishing Touches: Bringing Your Bedside Cabinet to Life

    Once your finish has dried, you can add finishing touches to personalize your bedside cabinet and make it truly unique.

    1. Distressing: Adding a Vintage Appeal

    Distressing can give your cabinet a rustic, vintage-inspired look. Use sandpaper or a sanding block to create subtle wear and tear, highlighting the wood grain and creating a more natural feel.

    2. Hardware: Accentuating Functionality and Style

    Choosing the right hardware can make a big difference in the overall appearance and functionality of your cabinet. Consider knobs, handles, drawer pulls, and hinges that complement the chosen finish and style.

    3. Protective Sealants: Enhancing Durability and Protection

    Apply a sealant to protect your finish from scratches, stains, and water damage. Polyurethane is a popular choice for its durability and water resistance.

    Conclusion: Crafting a Bedside Cabinet that Exudes Quality and Style

    By following these expert tips, you can transform your DIY bedside cabinet into a stunning piece of furniture that exudes quality and style. Remember, patience and attention to detail are key. Take your time, work meticulously, and enjoy the process of creating a beautiful and functional addition to your bedroom.

    Read More..

    Free DIY Compost Bin Blueprints (Downloadable PDF)

    Free DIY Compost Bin Blueprints (Downloadable PDF)

    Free DIY Compost Bin Blueprints (Downloadable PDF)

    Composting is a fantastic way to reduce waste, improve soil health, and create a nutrient-rich fertilizer for your garden. While there are many commercially available compost bins on the market, building your own can be a rewarding and cost-effective project. This article provides you with free, downloadable blueprints for creating your very own DIY compost bin, allowing you to customize it to your specific needs and preferences.

    Benefits of Building a DIY Compost Bin

    There are numerous benefits to building your own compost bin, including:

    • Cost-effectiveness: DIY compost bins are significantly cheaper than purchasing pre-made ones. You can often use readily available materials like pallets, wood, or even concrete blocks.
    • Customization: You can design your compost bin to fit your specific space, aesthetic preferences, and composting needs. This allows for flexibility in size, shape, and features.
    • Greater Control: Building your own compost bin gives you complete control over the materials used, the construction process, and the composting method. This empowers you to create a system that works best for you.
    • Environmental Sustainability: By using recycled or repurposed materials, you can significantly reduce your environmental footprint and contribute to a more sustainable lifestyle.

    Choosing the Right Compost Bin Design

    Before you start building, it's essential to consider the various compost bin designs available. Each design has its advantages and disadvantages, and the best choice will depend on your specific circumstances. Here are a few popular options:

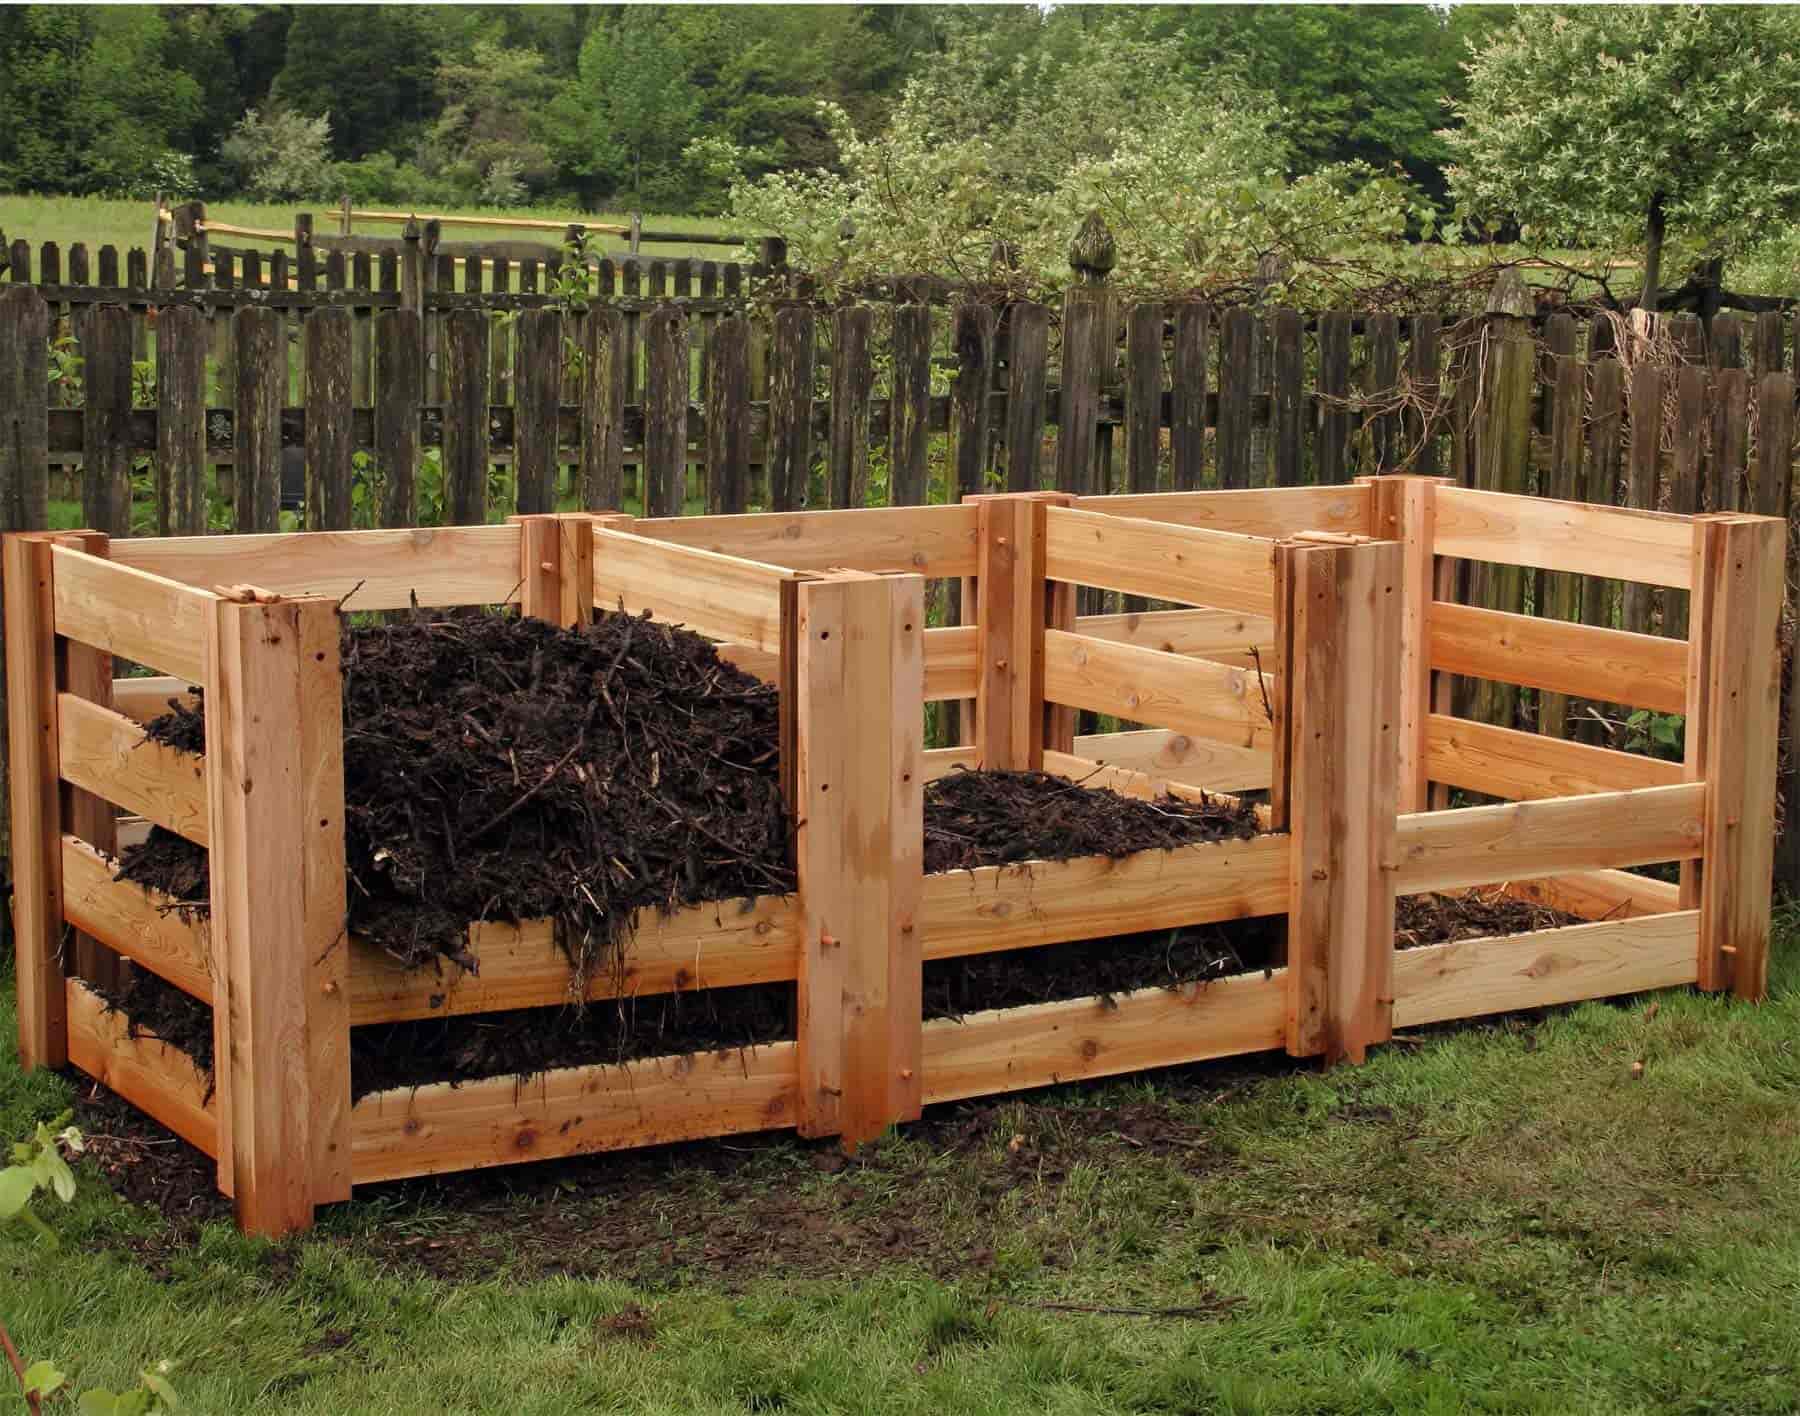
    Three-Bin System

    This system consists of three separate bins. One bin is used for active composting, another for finished compost, and the third for holding materials that need to break down further. The three-bin system allows you to manage the composting process efficiently and consistently.

    Tumbler Composter

    Tumbler composters are enclosed drums that rotate, ensuring even aeration and mixing of materials. They are relatively compact, ideal for smaller gardens, and offer faster composting times.

    Hot Compost Bin

    These bins are specifically designed to generate high temperatures for faster composting. They often have a larger capacity and are suitable for larger quantities of organic materials.

    DIY Pallet Bin

    A popular and simple option, using salvaged pallets for construction is both economical and environmentally friendly. You can create a single or multi-bin system using pallets.

    Concrete Block Bin

    Concrete blocks offer a durable and long-lasting construction. You can create a multi-bin system or a single bin depending on your requirements.

    Compost Bin Blueprints: Free Downloadable PDF

    Below are links to free downloadable PDF blueprints for various DIY compost bin designs:

    Three-Bin System Blueprint

    [Link to Downloadable PDF Blueprint]

    Tumbler Composter Blueprint

    [Link to Downloadable PDF Blueprint]

    Hot Compost Bin Blueprint

    [Link to Downloadable PDF Blueprint]

    DIY Pallet Bin Blueprint

    [Link to Downloadable PDF Blueprint]

    Concrete Block Bin Blueprint

    [Link to Downloadable PDF Blueprint]

    Materials and Tools Needed

    The specific materials and tools required will vary depending on the chosen compost bin design. However, some common materials include:

    • Wood (lumber, pallets)
    • Concrete blocks
    • Hardware (screws, nails, hinges, brackets)
    • Mesh wire (for ventilation)
    • Tools (saw, drill, hammer, screwdriver, level)

    Building Instructions

    The detailed building instructions will be provided in the downloadable PDF blueprints. However, here are some general steps involved in constructing a compost bin:

    1. Gather Materials: Ensure you have all the necessary materials and tools before starting.
    2. Prepare the Site: Choose a suitable location for your compost bin, ensuring adequate drainage and sunlight exposure.
    3. Cut and Assemble Frame: Cut the wood or other materials to the specified dimensions and assemble the frame using screws or nails.
    4. Add Ventilation: Install mesh wire on the sides or bottom of the bin for proper airflow.
    5. Construct Lid: Create a lid for the bin, allowing for easy access and aeration.
    6. Finishing Touches: Apply paint or stain to protect the wood and enhance the appearance of the bin.

    Composting Tips and Techniques

    Once your compost bin is built, follow these composting tips for successful results:

    • Brown to Green Ratio: Maintain a balanced mix of brown materials (carbon-rich) like leaves and twigs, and green materials (nitrogen-rich) like grass clippings and food scraps.
    • Moisture: Keep the compost moist, similar to a wrung-out sponge. Avoid overwatering or allowing it to dry out.
    • Aeration: Ensure proper airflow by turning the compost regularly or using a bin design that allows for sufficient ventilation.
    • Temperature: Ideal composting temperatures range from 130-160 degrees Fahrenheit. This can be achieved by maintaining a balanced brown-to-green ratio and ensuring proper aeration.
    • Patience: Composting takes time. Depending on the method and climate, it can take anywhere from a few weeks to several months for compost to break down completely.

    Conclusion

    Building your own compost bin is a rewarding and eco-friendly project that provides numerous benefits. These free DIY compost bin blueprints allow you to customize your composting system to fit your needs and preferences. With proper planning, construction, and composting techniques, you can easily transform your kitchen and garden waste into valuable fertilizer, contributing to a more sustainable lifestyle and enhancing your garden's health and productivity.

    Read More..

    How to Make a Classic Wooden Birdhouse with Simple Materials

    How to Make a Classic Wooden Birdhouse with Simple Materials

    Crafting a Classic Wooden Birdhouse: A Step-by-Step Guide

    Birdhouses, charming additions to any garden or backyard, provide shelter and nesting opportunities for our feathered friends. Constructing a classic wooden birdhouse is a rewarding project that allows you to create a unique haven for birds while enjoying the process of woodworking. This comprehensive guide will lead you through the steps of crafting a beautiful and functional birdhouse using simple materials.

    Materials and Tools

    Before embarking on your birdhouse construction, ensure you have the following materials and tools readily available:

    Materials

    • Wood: Select a rot-resistant and weatherproof wood, such as cedar, redwood, or treated pine. A 1x6-inch board will be sufficient for the majority of the birdhouse.
    • Screws: Use 1-1/4 inch or 1-1/2 inch wood screws for assembly.
    • Wood glue: Use a strong wood glue for secure bonding.
    • Paint or stain (optional): Choose a bird-safe paint or stain to protect the wood and enhance the aesthetic appeal.
    • Roofing shingles (optional): Shingles can add durability and a rustic touch to the roof.

    Tools

    • Circular saw or hand saw: Used for cutting the wood to size.
    • Measuring tape: For accurate measurements and marking.
    • Pencil or marker: For marking cuts and assembly lines.
    • Drill with drill bits: For pre-drilling holes to prevent wood splitting and screwing.
    • Screwdriver or drill driver: For driving screws.
    • Safety glasses: Protect your eyes from sawdust and flying debris.
    • Sandpaper: For smoothing rough edges and surfaces.
    • Level: Ensures that the birdhouse is level and stable.
    • Clamps (optional): To hold pieces together during assembly.

    Designing Your Birdhouse

    The design of your birdhouse can be tailored to your preferences and the specific bird species you intend to attract. Consider the following factors:

    Size and Shape

    The size of the entrance hole and the overall dimensions of the birdhouse should correspond to the bird species you wish to attract. For example, a small birdhouse with a 1-1/2-inch entrance hole would be suitable for chickadees or wrens, while a larger birdhouse with a 2-1/2-inch entrance would accommodate bluebirds or robins.

    Entrance Placement

    The entrance hole should be positioned near the top of the birdhouse, typically around 6 inches from the bottom. This placement helps protect the nest from predators and rain.

    Roof Style

    There are various roof styles to choose from, including gable, shed, and hip roofs. Gable roofs are popular for their classic look and effective water drainage. Shed roofs are simpler to construct, while hip roofs provide maximum protection from the elements.

    Ventilation and Drainage

    Adequate ventilation is crucial for maintaining a healthy nesting environment. Ensure the birdhouse has ventilation holes on the sides or under the roof. Consider adding a slight pitch to the roof to facilitate water drainage.

    Construction Steps

    Now that you have your materials and design in mind, let's delve into the construction process:

    Step 1: Cutting the Wood

    • Using the measurements from your chosen design, cut the wood into the required pieces. The main components will include the base, sides, back, front (including the entrance hole), and roof pieces.
    • Mark the location of the entrance hole on the front piece using a pencil or marker.
    • Carefully cut out the entrance hole using a jigsaw or drill with a hole saw.

    Step 2: Assembling the Base and Sides

    • Apply wood glue to the edges of the base and side pieces. Align them securely, ensuring a right angle, and clamp them together.
    • Pre-drill pilot holes and screw the side pieces to the base using wood screws.
    • Repeat this process for the other side, ensuring that both sides are symmetrically attached to the base.

    Step 3: Attaching the Back and Front

    • Apply wood glue to the edges of the back and front pieces. Carefully align them with the assembled base and sides.
    • Pre-drill pilot holes and screw the back and front pieces to the sides and base.
    • Use clamps if necessary to ensure tight and secure joints.

    Step 4: Constructing the Roof

    • Cut two identical roof pieces from the wood, ensuring the correct length and angle for your chosen roof style.
    • Apply wood glue to the edges of the roof pieces and carefully align them with the birdhouse frame, creating a slight overhang.
    • Pre-drill pilot holes and screw the roof pieces to the top of the birdhouse.
    • If using roofing shingles, attach them to the roof using roofing nails or staples, ensuring that they overlap properly.

    Step 5: Finishing Touches

    • Sand all the surfaces of the birdhouse to remove any rough edges or imperfections.
    • Apply a bird-safe paint or stain to protect the wood and enhance the appearance. Allow the paint or stain to dry completely before handling.
    • Once the paint or stain has dried, you can add additional decorative touches, such as a birdhouse sign or a small perch near the entrance hole.

    Installation and Placement

    Once your birdhouse is complete, it's time to find the perfect spot for it in your yard.

    Location

    • Choose a location that provides shelter from direct sunlight, wind, and rain. A location under a tree or near a shrub can provide natural shade and protection.
    • Avoid placing the birdhouse too close to the ground, as this can make it vulnerable to predators.
    • Position the birdhouse at least 5 feet from the ground, or higher if possible.

    Mounting

    • Attach the birdhouse to a sturdy support, such as a tree, post, or fence, using screws or brackets. Ensure that the birdhouse is level and stable.
    • Consider adding a small piece of wood or metal to the underside of the birdhouse as a landing platform for birds to perch before entering.

    Maintenance and Cleaning

    To ensure the longevity and safety of your birdhouse, regular maintenance is crucial.

    Cleaning

    • Clean the birdhouse after the nesting season is over, usually in the fall. Remove any old nesting materials and debris.
    • You can use a brush or vacuum cleaner to clean the interior of the birdhouse. Avoid using harsh chemicals that could harm birds.
    • Inspect the birdhouse for any signs of damage or deterioration and repair or replace any worn or broken parts.

    Predator Control

    • Keep the surrounding area around the birdhouse free of clutter and potential nesting sites for predators.
    • Consider adding a predator guard, such as a metal or plastic shield, around the entrance hole to deter cats or snakes.

    Conclusion

    Crafting a classic wooden birdhouse is a rewarding and fulfilling project that allows you to contribute to bird conservation while enjoying the satisfaction of creating something beautiful and functional. By following these steps and incorporating your own creativity, you can build a lasting haven for birds in your backyard and witness the joy of seeing them nest and raise their young.

    Read More..

    Squirrel Den Box Plans and Instructions PDF

    Squirrel Den Box Plans and Instructions PDF

    Squirrel Den Box Plans and Instructions

    Welcome to the world of backyard wildlife enhancement! This comprehensive guide will equip you with the knowledge and detailed plans to build a cozy and safe squirrel den box. This project is perfect for nature enthusiasts who want to attract these playful creatures to their gardens, providing them with a comfortable shelter while adding a touch of charm to your outdoor space.

    Choosing the Right Location

    Before embarking on construction, it's crucial to select a prime location for your squirrel den box. Consider the following factors:

    • Elevation and Drainage: Place the box at least 18 inches off the ground to prevent flooding and predator access. Ensure the location has good drainage to prevent water pooling around the base.
    • Sun Exposure: Squirrels prefer a spot with some shade during the hottest parts of the day, but also with adequate sunlight for warmth. A location under a deciduous tree that offers shade in the summer and allows sunlight in the winter is ideal.
    • Accessibility: Choose a spot easily accessible for you to check the box and clean it periodically. It should be near a tree for easy squirrel access but not directly on the trunk, as this can attract bark beetles.
    • Predators: Avoid placing the box too close to potential predator dens such as hawks, owls, or snakes. Consider natural barriers like thick shrubs or a dense hedge for added protection.

    Materials and Tools

    For this project, we'll utilize readily available and durable materials. Gather the following:

    Materials

    • Wood: Use untreated, weather-resistant wood like cedar, redwood, or pressure-treated lumber. Avoid using plywood as it can easily deteriorate.
    • Screws: Galvanized or stainless steel screws are recommended for their durability and resistance to rust.
    • Roofing Shingles: Use asphalt shingles for a waterproof roof that will last for years.
    • Paint or Stain: Optional, but adding a coat of paint or stain can help protect the wood and enhance the aesthetic appeal of the box.

    Tools

    • Measuring Tape: Accuracy is essential for precise cuts.
    • Saw: A circular saw, jigsaw, or handsaw will be needed for cutting the wood.
    • Drill: With a variety of drill bits for pilot holes and screw insertion.
    • Screwdriver: For secure fastening of the box components.
    • Hammer: For securing the roofing shingles.
    • Level: Ensuring the box is straight and level for proper construction.
    • Safety Glasses: Always protect your eyes when using power tools.
    • Work Gloves: For safe handling of the wood and tools.

    Squirrel Den Box Plans

    Here are the detailed plans for constructing a squirrel den box:

    Dimensions

    • Front Panel: 12 inches wide x 10 inches high
    • Back Panel: 12 inches wide x 10 inches high
    • Side Panels: 8 inches wide x 10 inches high (2 pieces)
    • Floor: 12 inches wide x 8 inches deep
    • Roof: 14 inches wide x 12 inches deep
    • Entrance Hole: 3 inches in diameter

    Construction Steps

    1. Cut the Wood: Using your chosen saw, cut the wood to the specified dimensions for the front, back, side panels, floor, and roof.
    2. Assemble the Walls: Lay the front and back panels flat, side by side. Attach the two side panels to the front and back panels using screws. Ensure the panels are flush and square.
    3. Create the Entrance: On the front panel, drill a 3-inch diameter hole for the entrance. Use a drill bit slightly smaller than the desired hole diameter, then gradually enlarge it with a hole saw or by using a jigsaw with a curved cutting guide.
    4. Attach the Floor: Place the floor panel inside the assembled box, aligning the edges. Secure it to the bottom of the walls using screws.
    5. Add Roof Supports: Cut two pieces of wood for roof supports, each measuring 8 inches long. Place them across the inside of the box, parallel to the back panel, and about 2 inches from the top. Secure the supports to the side walls using screws.
    6. Install the Roof: Place the roof panel on top of the box, aligning it with the edges of the walls. Attach the roof to the support pieces using screws.
    7. Secure the Roof: To ensure a weatherproof seal, install roofing shingles over the top of the roof. Use a hammer to secure the shingles in place.
    8. Paint or Stain: (Optional) Apply a coat of paint or stain to the exterior of the box. Let it dry completely before placing the box in its final location.
    9. Placement: Mount the squirrel den box to a sturdy tree or post at least 18 inches off the ground. Use galvanized or stainless steel brackets or screws to secure the box.

      Tips and Maintenance

      • Ventilation: Ensure the box has adequate ventilation by drilling small holes near the top of the back panel. This will prevent moisture buildup inside.
      • Cleaning: Clean the den box at least once a year, or more frequently if needed, to remove debris, droppings, and parasites. Use a stiff brush and soapy water to thoroughly clean the interior and exterior.
      • Monitoring: Keep an eye on the squirrel den box for signs of damage or wear and tear. Repair or replace any damaged parts promptly.
      • Wildlife Considerations: Remember that squirrels are wild animals, and they may not always use your den box. Be patient and create a welcoming environment in your yard with ample food sources and water. Avoid using pesticides or herbicides that could harm squirrels or other wildlife.

      Congratulations on completing your squirrel den box! This delightful project will not only provide a safe and cozy haven for squirrels but also add a touch of charm to your backyard. As you observe these playful creatures enjoying their new home, you'll be contributing to the vibrant ecosystem of your local environment.

    Read More..

    How to Build a Portable Cold Frame

    How to Build a Portable Cold Frame

    How to Build a Portable Cold Frame

    A cold frame is a simple but effective structure that allows you to extend your growing season and get a head start on your gardening. It essentially creates a mini-greenhouse, trapping solar heat and protecting plants from harsh weather conditions. Portable cold frames are particularly beneficial for gardeners with limited space or who want the flexibility to move the structure to different locations. This guide will provide a step-by-step walkthrough of how to build your own portable cold frame.

    Materials

    Before you begin, gather the following materials:

    • Wooden frame materials: Choose sturdy, rot-resistant wood like cedar, redwood, or pressure-treated lumber. You'll need boards for the base, sides, and top.
    • Glass or polycarbonate panels: These will serve as the transparent covering for your cold frame. Polycarbonate is more durable and impact-resistant than glass.
    • Hinges: These will connect the lid to the frame.
    • Screws: Use appropriate-sized screws for your wood and panel type.
    • Weatherstripping: This will create a tight seal around the lid to prevent heat loss.
    • Paint or sealant: Optional, but recommended for protecting the wood from the elements.
    • Tools: You'll need a saw, drill, screwdriver, measuring tape, level, and pencil.

    Choosing the Right Size and Dimensions

    The size of your portable cold frame will depend on your needs and available space. Consider these factors:

    • Number of plants: Determine the size of the cold frame needed to comfortably accommodate the plants you plan to grow.
    • Available space: Measure your available space and choose a cold frame that fits comfortably and can be easily moved around your garden.
    • Ease of handling: Make sure the cold frame is a manageable size and weight for you to move around.

    A standard portable cold frame is typically 3-4 feet wide, 4-5 feet long, and 1-2 feet high. These dimensions allow for a good balance of internal space and portability.

    Construction Steps

    Follow these steps to build your portable cold frame:

    Step 1: Build the Base

    • Cut two pieces of lumber for the length of the base and two pieces for the width. Ensure these pieces are square and straight.
    • Attach the pieces together using screws or nails to form a rectangle.
    • Optionally, add cross braces for extra strength and stability.

    Step 2: Assemble the Sides

    • Cut four pieces of lumber to the desired height of the cold frame. These will form the sides.
    • Attach the sides to the base using screws or nails, ensuring they are square and level.
    • For added support, add corner bracing to the sides.

    Step 3: Create the Lid

    • Cut two pieces of lumber for the length of the lid and two pieces for the width.
    • Attach the pieces together to form a rectangle, similar to the base.
    • Cut pieces of glass or polycarbonate to fit the lid dimensions.
    • Attach the glass or polycarbonate panels to the lid using screws or adhesive.

    Step 4: Attach the Lid to the Frame

    • Position the lid on top of the frame and mark hinge locations.
    • Attach the hinges to the lid and frame using screws.
    • Secure the lid to the frame using a latch or other locking mechanism.

    Step 5: Add Weatherstripping

    • Apply weatherstripping around the edges of the lid to create a tight seal.
    • This will help prevent heat loss and keep the cold frame warm.

    Step 6: Finishing Touches

    • Sand the wood smooth and apply a sealant or paint for protection.
    • Consider adding handles to the sides of the cold frame for easier transport.
    • You can create a raised bottom using bricks or wood blocks to improve drainage and ventilation.

    Using Your Portable Cold Frame

    Once your portable cold frame is built, you can start using it to extend your gardening season and protect your plants:

    • Choose the right location: Select a sunny spot with good drainage for your cold frame. Ensure it's easily accessible for planting and maintenance.
    • Prepare the soil: Fill the cold frame with a good quality potting mix or soil. Ensure it's well-drained to prevent root rot.
    • Plant your seedlings: Carefully transplant seedlings into the cold frame, leaving adequate space between them.
    • Monitor temperature and ventilation: Regularly check the temperature inside the cold frame and adjust ventilation as needed to maintain optimal growing conditions.
    • Water regularly: Keep the soil moist, but not waterlogged.
    • Protect from pests and diseases: Monitor for pests and diseases and take appropriate measures to control them.

    Benefits of a Portable Cold Frame

    Using a portable cold frame offers several advantages for gardeners:

    • Extended growing season: Cold frames help extend the growing season by protecting plants from frost and cold temperatures.
    • Head start on seedlings: Start seeds indoors in the cold frame for a head start on the outdoor season.
    • Protection from harsh weather: Cold frames shield plants from wind, hail, and other weather conditions.
    • Improved soil warmth: Cold frames trap solar heat, warming the soil and creating a favorable microclimate for plant growth.
    • Versatility: Move the cold frame to different locations within your garden to optimize sunlight exposure or protect specific plants.
    • Space efficiency: Ideal for gardeners with limited space as they can be placed on patios, balconies, or even indoors.

    Conclusion

    Building a portable cold frame is a rewarding DIY project that can significantly enhance your gardening experience. With careful planning and construction, you can create a durable and functional structure that will extend your growing season, protect your plants, and provide numerous other benefits. By following the steps outlined in this guide, you can enjoy the advantages of a portable cold frame and reap the rewards of a successful and productive garden.

    Read More..

    How to design and build a grill gazebo with custom lighting

    How to design and build a grill gazebo with custom lighting

    Designing and Building a Grill Gazebo with Custom Lighting

    A grill gazebo offers a versatile outdoor space for entertaining, cooking, and relaxation. By adding custom lighting, you can elevate the ambiance and functionality of your gazebo, transforming it into a captivating focal point. This comprehensive guide outlines the essential steps involved in designing and building a grill gazebo with custom lighting, empowering you to create a truly unique and enjoyable outdoor haven.

    Conceptualizing Your Grill Gazebo

    The initial step in the design process involves clearly visualizing your ideal grill gazebo. Consider the following factors:

    Size and Shape

    Determine the appropriate size to accommodate your grill, seating, and other desired amenities. Common gazebo shapes include square, rectangular, octagonal, and hexagonal, each offering distinct visual appeal and space utilization.

    Material Selection

    Choose materials that align with your aesthetic preferences and durability requirements. Popular options include:

    • Wood: Offers a classic and warm aesthetic but requires regular maintenance.
    • Aluminum: Lightweight, rust-resistant, and low-maintenance.
    • Vinyl: Durable, weather-resistant, and available in various colors.
    • Fabric: Provides shade and a more open feel but may require replacement over time.

    Lighting Concept

    Envision the lighting scheme that will complement your gazebo's design and create the desired atmosphere. Consider:

    • Ambient Lighting: Provides general illumination for the entire space.
    • Task Lighting: Focuses on specific areas like the grilling station or dining table.
    • Accent Lighting: Highlights architectural features or landscaping.

    Budget and Timeframe

    Establish a realistic budget and timeline for the project. Factor in costs for materials, labor (if hiring professionals), permits, and potential unforeseen expenses. This will help you stay on track and make informed decisions throughout the design and construction process.

    Planning and Design

    With your initial concept in mind, it's time to translate your vision into a detailed plan. This stage involves:

    Drawing a Detailed Sketch

    Create a scaled drawing of the gazebo, outlining its dimensions, shape, roof design, and any structural elements. This will serve as your blueprint and help you visualize the final outcome.

    Selecting Lighting Fixtures

    Choose lighting fixtures that align with your design aesthetic and functional needs. Consider:

    • Pendant Lights: Offer a stylish and practical solution for general illumination.
    • Track Lighting: Provides flexibility to direct light towards specific areas.
    • String Lights: Create a festive and cozy atmosphere with a touch of whimsy.
    • LED Strip Lights: Offer energy efficiency and versatile installation options for accent lighting.

    Planning Electrical Wiring

    Determine the electrical wiring requirements for your lighting system. This may involve:

    • Running new wiring: If existing outlets are insufficient.
    • Installing a dedicated circuit: To ensure adequate power for your lighting fixtures.

    Obtaining Permits

    Check with your local building department to determine if permits are required for your grill gazebo construction. This may vary depending on the size, complexity, and location of the structure.

    Building the Grill Gazebo

    Once you have your design and plans in place, it's time to begin construction. This involves:

    Foundation and Framing

    Create a sturdy foundation using concrete piers, pavers, or a wooden platform. Construct the frame using pressure-treated lumber or aluminum for longevity and stability.

    Roofing and Siding

    Choose a roof material that suits your design and climate. Options include shingles, metal roofing, or fabric covers. Install the siding to enclose the structure and provide protection from the elements.

    Installing Electrical Wiring

    Carefully run electrical wiring for your lighting fixtures, ensuring proper grounding and adhering to all electrical codes. Consult a licensed electrician if you're unsure about any aspect of the process.

    Adding Custom Lighting

    Mount your chosen lighting fixtures securely, taking care to position them strategically to achieve your desired illumination effects. Consider:

    • Pendant lights: Hang them from the ceiling to provide general illumination.
    • Track lighting: Install it on the walls or ceiling for flexible light direction.
    • String lights: Drape them across the roof or along the perimeter for a warm glow.
    • LED strip lights: Mount them underneath the eaves, on the posts, or even within the framing for accent lighting.

    Finishing Touches

    Complete the gazebo by adding finishing touches such as:

    • Outdoor furniture: Create a comfortable seating area for relaxation and entertaining.
    • Decorative accents: Incorporate elements that reflect your personal style and enhance the ambiance.
    • Landscaping: Enhance the surrounding area with plants, flowers, or other landscaping features.

    Safety Considerations

    Ensuring the safety of your grill gazebo is paramount. Follow these guidelines:

    • Electrical safety: Ensure all electrical connections are properly grounded and protected from moisture.
    • Fire safety: Keep a fire extinguisher readily accessible and maintain a clear area around the grill. Install smoke detectors for added protection.
    • Structural stability: Regularly inspect the gazebo for signs of wear and tear, and make necessary repairs promptly.

    Conclusion

    By following these comprehensive steps, you can design and build a stunning grill gazebo with custom lighting that will elevate your outdoor living experience. Remember to plan meticulously, prioritize safety, and personalize the design to reflect your unique style and preferences. Your custom grill gazebo will become a cherished gathering place for memorable evenings and enjoyable outdoor gatherings.

    Read More..

    How to make a large wooden clock with a rustic finish

    How to make a large wooden clock with a rustic finish

    Building a Rustic Wooden Clock: A Step-by-Step Guide

    Imagine a large, rustic wooden clock gracing your living room wall, its ticking a soothing rhythm against the backdrop of your cozy home. This timeless piece can add a touch of warmth and character to any space. In this guide, we'll walk you through the process of crafting a stunning rustic wooden clock, from choosing the right materials to applying the perfect distressed finish.

    Gather Your Materials

    Before you start, ensure you have all the necessary materials. This project requires a combination of woodworking skills and a creative touch:

    • Wood: Choose a sturdy hardwood like oak, walnut, or pine. Opt for reclaimed wood for an authentic rustic look.
    • Clock Mechanism: Select a high-quality clock mechanism that suits the size and style of your design.
    • Clock Hands: Choose hands that complement the overall aesthetic of your clock.
    • Wood Glue: Use a high-quality wood glue for secure bonding.
    • Wood Stain: Select a stain color that matches your desired rustic look. Walnut or mahogany stains are popular choices.
    • Wood Finish: Apply a protective finish like polyurethane or wax to seal and protect the wood.
    • Sandpaper: Use a variety of grits, starting with coarse and gradually moving to finer grits for a smooth finish.
    • Power Drill: Use a drill to create holes for the clock mechanism and hands.
    • Measuring Tape: Ensure precise measurements for accurate cuts and assembly.
    • Saw: Use a saw to cut the wood to your desired dimensions. A circular saw, table saw, or jigsaw are suitable options.
    • Clamps: Hold the pieces together securely while the glue dries.
    • Safety Gear: Always wear eye protection and a dust mask when working with wood.

    Crafting the Clock Face

    The heart of your rustic clock is the clock face. This section provides a detailed guide to constructing it:

    Designing the Shape

    Choose the desired shape for your clock face. A circular, square, or rectangular design can all work beautifully with a rustic aesthetic. Sketch your design on paper and determine the dimensions.

    Cutting the Wood

    Using your saw, carefully cut the wood to your specified dimensions. Make sure the cuts are clean and precise. For a circular clock face, you can use a compass or a router to create a perfect circle. If you're working with reclaimed wood, expect natural imperfections and variations in color and texture, which will enhance the rustic character of your clock.

    Assembling the Clock Face

    If your design involves multiple pieces of wood, carefully join them using wood glue. Clamp the pieces together firmly and allow the glue to dry completely before proceeding.

    Installing the Clock Mechanism

    The clock mechanism is the driving force behind your creation. Follow these steps to install it correctly:

    Choosing the Right Mechanism

    Select a clock mechanism that matches the size and style of your clock face. Consider the type of movementâ€"quartz for silent operation or mechanical for a more traditional ticking sound.

    Marking the Center

    Precisely mark the center of your clock face using a pencil and measuring tape. This is where you will attach the clock mechanism.

    Drilling the Hole

    Using a drill bit slightly smaller than the diameter of the clock mechanism's mounting hole, drill a hole through the center of your marked location. Make sure the hole is deep enough to securely accommodate the mechanism.

    Attaching the Mechanism

    Carefully attach the clock mechanism to the back of the clock face. Ensure it is centered and secure.

    Attaching the Clock Hands

    Once the clock mechanism is installed, it's time to add the hands that will bring your clock to life. Follow these steps:

    Choosing Clock Hands

    Select clock hands that complement the size and style of your clock face. Consider the length, material, and design of the hands to ensure a harmonious look.

    Attaching the Hands

    Most clock mechanisms come with instructions on how to attach the hands. Typically, this involves using small nuts or screws to secure the hands to the mechanism's axles. Ensure the hands are securely attached and aligned correctly.

    Adding the Finishing Touches

    Now it's time to give your rustic clock its final touch:

    Sanding

    Start by sanding the clock face with coarse sandpaper to smooth out any rough edges or imperfections. Gradually move to finer grit sandpaper to achieve a smooth and even finish. Sand the edges and corners to create a distressed look.

    Applying the Stain

    Choose a stain that complements the wood and your desired rustic aesthetic. Apply the stain evenly to the clock face, following the manufacturer's instructions. Allow the stain to dry completely before proceeding to the next step.

    Finishing with Polyurethane or Wax

    Apply a protective finish to the clock face to seal the wood and enhance its durability. Polyurethane offers a durable, water-resistant finish, while wax provides a more natural look. Choose the finish that best suits your needs and apply it evenly according to the manufacturer's instructions.

    Distressing the Finish

    To achieve a truly rustic look, distress the finish using sandpaper. Gently rub the edges and corners of the clock face to create a worn and aged appearance. You can also use a wire brush to create additional texture and distress. The degree of distressing is entirely up to your personal preference, so experiment until you achieve the desired look.

    Hanging Your Rustic Clock

    The final step is to hang your rustic clock in a prominent place where its beauty can be appreciated:

    Selecting the Hanging Location

    Choose a location that complements the clock's size and style. It could be above a fireplace, in a hallway, or on a large wall in your living room. Consider the lighting and background of the chosen spot to highlight the clock's rustic charm.

    Installing the Hanging Hardware

    Most clock mechanisms come with a hanger or bracket for easy installation. If not, you can purchase a suitable hanging hook or bracket from a hardware store. Ensure the hanging hardware is sturdy enough to support the weight of the clock.

    Hanging the Clock

    Carefully hang the clock on the wall, making sure it is securely attached and level. Once your rustic clock is in place, stand back and admire your creation! It's a unique and timeless piece that will become a treasured addition to your home.

    Read More..